
Ceiling Fan Outfit Transition
One person, three outfit reveals. Upload your photo, choose three looks and generate an overhead fan-blade transition video.
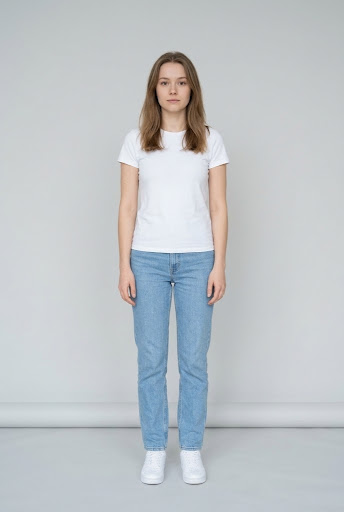
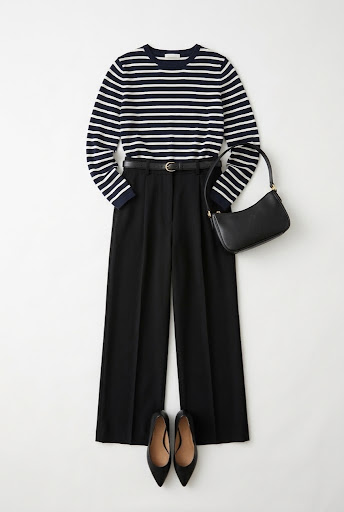
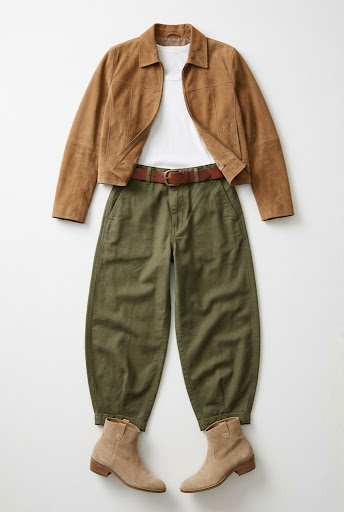
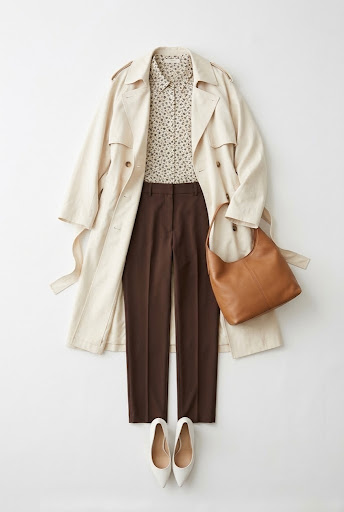
Upload references
Three outfits are included. Upload your photo, or click an outfit to replace it.
Fan outfit models: Kling 4.0 for video; Nano Banana Pro for keyframe images. Processed through Kie APIs. AI content policy
Upload details
1 person photo + 3 outfit references. JPG, PNG or WebP; up to 10 MB each. Clear original photos are recommended.
I have permission to use these images and agree to their storage and processing by AI services to generate my video.
Create three fan outfit transitions and combine them into an approximately 12-second vertical video, ready to download.
What is the ceiling fan outfit transition?
A ceiling fan outfit transition is an overhead fashion video: a fan blade moves across the foreground, hiding the moment when one look becomes another. The camera stays above the person so the clothing reveal is easy to follow. You may also see this effect described as a fan outfit change or Under the Fan. The key detail is the wipe itself—the new outfit appears behind the passing blade, instead of the whole image fading into a different scene.
Inside our 12-second outfit-change demo
The example at the top of this page is a generated video made during our template tests. It starts with a white T-shirt and jeans, then moves through three styled looks. The person stays on the same rug beside the pink sofa, while the arms and legs change pose between outfits. The small photo cards around the video show the example inputs.
| Sequence | Look in the demo | What changes |
|---|---|---|
| Opening | White T-shirt, blue jeans and white sneakers | The starting look establishes the person and room. |
| First reveal | Striped top, black trousers and black heels | A darker, tailored silhouette replaces the casual outfit. |
| Second reveal | Tan jacket, olive trousers and ankle boots | Layering and warmer colors distinguish the next look. |
| Final reveal | Cream trench, printed blouse, brown trousers and shoulder bag | A longer outer layer and accessories complete the sequence. |
The demo combines three short transitions into approximately 12 seconds of vertical 9:16 video at 720p. It is an example of the intended effect, rather than a promise that every new photo will reproduce the same face, clothing details or motion.
How to prepare your fan outfit transition
- 1
Upload the person
Add one clear photo in the person slot. Choose a single subject whose face is easy to see. A full-body photo also gives a useful reference for proportions and the opening outfit. You do not need a fan or an overhead camera in your uploaded photo.
- 2
Choose three looks
The three outfit slots already contain the template wardrobe. Keep those looks, replace any slot with your own image, or restore a preset after trying an alternative. Slot 1 is the first outfit reveal, followed by slots 2 and 3.
- 3
Generate and download
Check your portrait, outfit order, image-use confirmation and the displayed credit price, then select Generate video. The workflow creates a consistent scene and three styled frames, generates three fan transitions and combines them into your video. The result page shows progress and provides playback and download when it is ready.
Which portrait and clothing photos should you use?
| Photo | Why | |
|---|---|---|
| Works well | One person with a clearly visible face | Use even light and a sharp original image. Keep the face unobstructed so the identity reference is easy to read. |
| Works well | One complete outfit per clothing slot | Show the jacket or top, trousers or skirt, and shoes when they matter. A clear outfit layout makes your intended combination easier to understand. |
| Works well | Looks with different shapes and colors | Compare the striped tailoring, olive trousers and long trench in the demo. Differences in silhouette help each reveal read quickly. |
| Use with care | Tiny logos, fine patterns and jewelry | These details can change during AI generation. Inspect them in the finished clip if they are important to your look. |
| Avoid | Collages, covered garments and heavy filters | Several competing outfits in one image make the reference ambiguous. Use a separate, unobstructed image for each look instead. |
Plan a lookbook with three distinct reveals
Give the outfits a simple connection before choosing the images. For a day-to-evening concept, move from relaxed basics to tailored layers and a more dressed-up final look. For a seasonal wardrobe idea, vary outerwear and color while keeping the person and room familiar. These are styling directions you can prepare, not additional tested examples.
Avoid changing everything at once. A different room, camera angle and hairstyle can distract from the clothes. Our demo keeps the rug and sofa as visual anchors while allowing modest pose changes, so each new outfit remains the main event. Include the shoes and accessories in the relevant outfit image if you want them considered with that look. This is a creative outfit video, not a measurement-based virtual fitting or proof of how a garment will fit.
What to check in a fan-blade outfit reveal
A pale trail remains after the blade passes
Earlier video tests sometimes left a white remnant of the previous outfit. Look at the first clear frames after each sweep, especially around sleeves, the waist and shoes. A successful example does not guarantee that another input will avoid this artifact.
The fan or room changes shape
Check that the foreground blade stays recognizable and that the rug and sofa do not jump between reveals. Extra blades, a changing hub or a shifting camera can make the join more noticeable.
The clothes blend or a pose becomes awkward
The next outfit should be readable once the blade clears. Review the hands, crossed legs, coat hem and bag strap as well as the face. A gradual blend of two outfits is different from the clean occlusion shown by the intended effect.
Ceiling fan outfit transition FAQ
Is Under the Fan the same as the ceiling fan transition?
In the outfit-video context, both names refer to the overhead effect where a passing fan blade hides a change of clothes. The exact wardrobe, number of looks and timing depend on the particular template.
How many photos do I need to upload?
You only need to upload one person photo if you keep all three preset outfits. To choose your own wardrobe, replace up to three outfit slots. There are four reference slots in total: one person and three outfits.
Can I use my own clothes instead of the template outfits?
Yes. Click an outfit thumbnail to upload a replacement for that slot. You can mix your own images with the presets, and use the restore control to return a replaced slot to its template outfit. Check the order before submitting.
Do I need to film under a real ceiling fan?
No. This AI workflow uses a prepared overhead scene. Your uploaded person photo does not need to contain a ceiling fan, rug or sofa, and you do not need to recreate the demo room yourself.
How is this different from a CapCut fan transition template?
This page generates an AI outfit sequence from still-photo references. If you are looking for an editable CapCut project or want to cut together your own filmed outfit takes, that is a different workflow. We do not provide a CapCut project download here.
What image formats are accepted?
Use JPG, PNG or WebP, with each image no larger than 10 MB. Clear original photos are recommended. An image that passes the upload checks can still be a weak creative reference if the face or outfit is hard to see.
Is the video 12 seconds or 15 seconds?
The workflow generates three transitions of about four seconds each, in 9:16 at 720p. They are combined in order while preserving their actual duration, so the result is approximately 12 seconds. The original trend reference is a separate 15-second clip.
Does submitting my photos generate a free video?
No. Uploading a photo alone does not start generation. Review the displayed price before confirming: guests can pay for one video without signing in, and signed-in users can use account credits. Your references are then used to create the outfit frames, three transitions and the combined video.
What happens if my video generation fails?
For a confirmed failure of an account-credit generation, the credits used for that task are automatically returned. If a guest single-video order fails or is not delivered, email support@trendredo.com with the order or job ID to request a cash refund under the refund policy, or agree to a retry. No account is required. Returned credits are not an automatic cash refund. A queued or processing job has not necessarily failed. See the refund policy below for details.
The fan transition name and reference
Ceiling fan transition appears in Dreamina’s effect guide, while Bolly also describes the outfit format as Under the Fan. Both describe the passing blade as the reveal between looks. The generated demo at the top of this page shows the result of our own template tests.
Sources: Dreamina — Ceiling Fan Transition (read Oct 23, 2026); Bolly — Ceiling Fan Transition / Under the Fan (read Oct 23, 2026)